Home      About      A Health Perspective      My Story      My WAPF Chapter      Disclaimer
Foods That Restore      This I Believe      Articles and More      Email Me      Follow My Blogs

 
Stoneware: For the Best Baking Ever

Feel free to read the entire article or use the links below to go to the three most frequently requested topics:


Written by Maria Atwood

© April 6 2011

As a member and chapter leader of the Weston A. Price Foundation, I have made every effort within my means to return to food that is truly healthy, life-giving and unprocessed. I had previously spent an inordinate amount of time reading about and experimenting with diet after diet. During those years I avoided many of the wonderful baked dishes that I now enjoy with gusto. When I made the transition from lowfat, vegetarian and vegan eating to a traditional, whole food, full-fat lifestyle, I naturally rediscovered the wonderful foods my mother had made in her earlier years. I also remembered our good neighbors and family friends from my youth, the Italian farmers, Mr. and Mrs. Mello. Oh, the sweet smell and taste of the fabulous Italian bread baked in their outdoor stone oven was heaven on earth!


In my research and rediscovery of the many traditional foods eaten by our forebears, it was only a matter of time before I began to seek out the best cooking and baking vessels available as well, and found the marvelous warmth-giving quality of stoneware baking pans. Not only my food but also my ovenware has since undergone a complete transformation from top to bottom, and stoneware holds a special place in my kitchen, making it "the best baking medium ever."


Prior to my introduction to the fine product I'm currently using, I was not seriously interested in stoneware, because for one thing I'd heard that the major brands would, with time, turn blackish on the inside. Also there were the issues regarding the need to hand wash as they were not dishwasher safe, nor was I able to pre-prepare a dish, freeze it, and then take it straight from the freezer to the oven. Last but certainly not least was the ever-looming concern of toxic substances that I had heard could be part of stoneware and earthenware. I grew up in an era when we were cautioned not to eat from these types of dishes, as they are often made in other countries and potentially contain high levels of lead and other unregulated toxic substances. At the time I did not know the difference between earthenware and stoneware baking pans. No, instead I would just continue to use my cold, lifeless glass pans or some older metal ones that I had stashed away in my cupboard. But when I began the transformation of my diet to the healthy traditional foods of our ancestors, the memory of Mr. and Mrs. Mello and their masonry oven tugged at me and I looked again at stoneware cooking vessels. I have since learned of the safety, superiority, and earthy appeal of stone cookware. I now bake exclusively with stoneware, and encourage others to do the same.


VIRTUES OF STONEWARE


True stoneware, which has been vitrified during the firing process, is impervious to moisture. The silica in the clay fuses at extremely high firing temperatures, creating a strong, glass-like consistency. Stoneware has a reputation for being "hard as stone" and is nearly non-porous. Earthenware on the other hand is fired at lower temperatures, and the resulting vessels are less strong than stoneware and also quite porous. Baking techniques often require you to soak earthenware to allow it to absorb water which it releases as the dish cooks in the oven, producing moist, evenly cooked foods. You will find many examples of earthenware on the Internet and in cooking catalogs. Stoneware is better utilized in instances when you might otherwise use a glass or metal baking pan because what you are cooking does not need the "steaming action" of a soaked earthenware vessel.


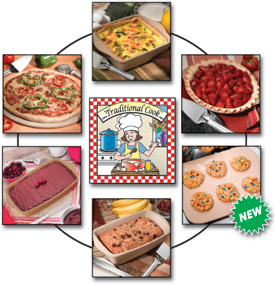
The question of safety when using stoneware often comes up, and for good reason. As mentioned above, there has always been the possibility that it may contain lead or other toxic metal substances. Traditional Cook markets one of the finest American-made stoneware products available. All the raw materials used in manufacturing begin as naturally occurring soft clay, sand or stone composites that are removed from the mine site (land reclamation practices are in place), transferred to a processing plant where they are washed clean, blended, ground, sized, and packaged for shipping.


No Toxicity Statement

Firing is done in batches with natural gas at 2100 degrees Fahrenheit; the firing process takes approximately twelve hours to complete. Once fired the item is next subjected to a stringent quality assurance process, packaged, and shipped. They are guaranteed to be free of lead, cadmium, and other known carcinogens, assuring that when fired to a greater than 2100 degree temperature the finished products will maintain food-safe surfaces for the lifetime of the item. They also meet both the FDA and California Proposition 65 standards for food-safe surfaces.


The two major reasons why stoneware bakes so much better than glass or metal is due to its microscopically porous surface and the even heat distribution that stoneware so adequately provides. Because this microscopically porous material circulates the evaporated moisture from the food while baking, it naturally allows the food to bake crispier on the outside, such as would be the case with pizza crust. At the same time it helps retain the moisture in the interiors of baked foods such as casseroles, breads, pies and meats.


Another plus is that stoneware is stick-resistant thanks to the slightly rough surface, which decreases the actual surface area in contact with the food item, thereby reducing the area of contact that might adhere during baking. You may however use oil to coat your stoneware without any worry of reducing its efficiency or that it might bake into the stoneware and cause it to blacken over time. I love these unique features!


Foods baked in stoneware are therefore cooked as Mother Nature intended. Imagine your loaf of bread, apple pie or casserole baked in the warmth of stone that radiates the energy of the earth from which it came. The beauty of the piece is also an asset to any dining experience, as stoneware can be placed on the table with pride for your family and guests.


Not only is stoneware totally non-toxic, but also it will also go from freezer to a pre-heated oven at 400 degrees, is dishwasher safe, and requires no pre-seasoning. The fact that it does not require pre-seasoning, and can be safely put in your dishwasher means that while the product is used long term, it will still look fresh and new.


Stoneware, because it is more costly to produce, and is more durable and impermeable, will require that you spend a bit more than if you were to purchase mass-produced baking pans. That being said, the joy of using your stoneware will far outweigh the small cost difference. Based on this information, I became so enamored with stoneware for all my baking, that I finally decided not only to use it myself but also to make it available to others. Happy baking!

RECIPES


KEFIR PIZZA DOUGH
For round 15-inch stoneware pizza stone


1 cup freshly ground whole wheat
3/4 cup kefir
3/4 cup unbleached white flour
1 teaspoon salt


This recipe uses kefir as the only liquid and only leaven. It is simply scrumptious! Mix flour with kefir and salt with a spoon until you can't anymore. Turn out onto a flat surface and knead until soft and pliable. Cover and set in a warm place until it has risen-this may take up to 24 hours depending on your home temperature. Punch down and shape into whatever you are baking. Adapted from Kefir Flat Bread (http://maria.fremlin.de/recipes/naan.html).


COCONUT BREAD
For 5 1/2-inch by 9-inch stoneware loaf pan


12 whole eggs
1 cup butter, slightly melted
1/4 cup honey (optional or use less)
1 teaspoon salt
1 1/2 cups sifted coconut flour
2 teaspoons baking powder


This bread is made with full fat coconut flour. It can be used much like regular bread, or in lieu of pound cake. The leavening comes from the eggs and baking powder, since coconut flour lacks gluten. Blend together eggs, butter, honey and salt. Combine coconut flour with baking powder and whisk thoroughly into batter until there are no lumps. Pour into greased (I use coconut oil) stoneware loaf pan, and bake at 335 degrees in the middle of the oven for approximately 1 hour or until a toothpick comes out clean, and bread is nicely browned. Remove from oven, place stoneware on a rack, and allow the bread to cool completely in the pan. Turn pan over gently with one hand on top of the bread to allow the loaf to drop out gently. Adapted from Cooking With Coconut Flour, Bruce Fife, ND.


ALMOND FLOUR APPLE CAKE
For an 8-inch by 8-inch square stoneware pan


1 cup finely chopped McIntosh apples
1/2 cup butter, softened
4 ounces softened cream cheese, preferably homemade
1/3 cup maple syrup (or to taste)
5 eggs, at room temperature
1 teaspoon vanilla
1 1/2 cups plus 2 tablespoons almond flour
1 teaspoon baking powder
1 1/2 teaspoons cinnamon
pinch of salt


Peel and core the apples, then chop finely. In a medium bowl, cream the butter, cream cheese and maple syrup. Add the eggs, one at a time, blending thoroughly. Mix the almond flour, baking powder, cinnamon and salt. Add to the egg mixture a little at a time. Gently fold in the apples. Pour into a greased stoneware pan. Bake at 350 degrees for 35-40 minutes or until toothpick comes out clean. The cake will be golden brown and firm to the touch when done.


CHILE RELLENO CASSEROLE
For a 9-inch by 13-inch rectangular stoneware pan


8-9 eggs, beaten
1/2 cup raw whole milk
1 large can whole green chiles, sliced and seeded
1 pound Monterey Jack cheese, sliced
3 cups Monterey Jack cheese, shredded
Crushed red pepper, to taste


Thoroughly beat eggs and milk. Pour half of eggs into an oiled 9-by-13 inch pan. Top with half a can of whole green chilies sliced and layered over eggs. Cover with sliced Monterey Jack cheese. Repeat another layer of eggs, chili and top with grated cheese. Sprinkle crushed red pepper to taste over top and bake at 325 degrees for 40-45 minutes. Adapted from cooks.com


PEACH -WALNUT SPROUTED QUICK BREAD
Stoneware loaf pan


2 cups sprouted whole wheat flour
1/2 teaspoon each baking power (aluminum free), baking soda and sea salt
1 heaping teaspoon cinnamon or apple-pie spices
2 beaten eggs (free range)
1/2 cup full fat yogurt
1/3 cup honey or maple syrup
1 cup chopped peaches
1 cup crispy walnuts (from Nourishing Traditions.)
2 tablespoons Rapadura or maple sugar


Mix flour, spices and salt together. In a small bowl mix the eggs, yogurt and honey or maple syrup. Mix the dry and wet ingredients and stir in the peaches and walnuts. Pour into a well-buttered loaf pan and sprinkle the top with Rapadura or maple sugar. Bake at 350 degrees for 40 minutes, then test with toothpick or sharp knife. Bake another 15 minutes if toothpick or knife does not come out clean. This recipe takes 40-60 minutes to bake depending on your specific conditions. From Discussing NT Yahoo Group.


YOGURT HERB BREAD
Stoneware loaf pan


3 cups freshly ground spelt, kamut or
whole wheat flour
2 cups plain whole yogurt
1/2 cup filtered water
3 large eggs, lightly beaten
1 teaspoon sea salt
2 teaspoons baking soda
1/4 stick melted butter
1/3 cup maple syrup
1 teaspoon dried dill
1/2 teaspoon each dried oregano, thyme, basil and tarragon


Mix flour with yogurt and water, cover and leave in a warm place for 12 to 24 hours. Bread will rise better if soaked for 24 hours. Place flour mixture in food processor and process for several minutes to knead the dough. Add remaining ingredients and process until well blended. Pour into a well buttered and floured loaf pan (preferably stoneware).


Bake at 350 degrees for at least 1½ hours, or until a toothpick comes out clean. From Nourishing Traditions , page 484.

About the author:

Maria Atwood, CNHP, is the Weston A. Price Foundation Chapter Leader for the Eastern Plains of Colorado. She is based in Colorado Springs, CO and serves Burlington and the surrounding areas. Maria's 90-minute DVD, "Cook Your Way to Wellness," can help Nourishing Traditions beginners learn to make basics like kefir, whey, beet kvass, fermented veggies, kombucha, butter, bone broth, soaked grains, crispy nuts, and more. The accompanying booklet, "Tell Me More," provides additional information and resources.


Product, Pricing & Buy
5 Unique Reasons to Buy
Recipes
Follow my health giving blog posts at "Tips From The Traditional Cook".

Home      About      A Health Perspective      My Story      My WAPF Chapter      Disclaimer
Foods That Restore      This I Believe      Articles and More      Email Me      Follow My Blogs


© 2005-2021 Traditionalcook.com & Cook Your Way To Wellness
All Rights Reserved. No part of this web site may be reproduced in any manner.